Showing posts with label cake. Show all posts

Tuesday, April 14, 2015

Seahawks Football Cake and Cupcakes

While football season may be a few months away, true fans celebrate with their team year round! And so is the case with this weeks cake. It was made for a 80 year old Seahawks super fan! He was having a large party with all of his kids, grandkids, and great grandchildren so we did a small cake and a bunch of cupcakes for everyone. We chose to do vanilla cupcakes with fresh raspberry filling and vanilla buttercream. 
For decorations I chose to make some chocolate football toppers (as always, I found the mold for these online at amazon). I used white chocolate for the laces and then milk chocolate for the footballs. They were adorable!


I also made some stars in Seahawk colors to be toppers as well, for those who did not want chocolate. 


I made up 100 vanilla cupcakes for the party, and also used dark blue and lime green cupcake papers to match the Seahawk team colors. 


I used an apple corer to cut out the center of the cupcakes. I cut off the inside but kept the top so that I could put it back on when they were filled. 


I made some amazing raspberry filling with some fresh raspberries (it was delicious!), then filled up all the cupcakes. 


I placed the tops back on so that the raspberry filling wouldn't spill out all over the place.


And then topped them with a light, fluffy vanilla buttercream.


This is what they looked like in the middle. They were one of my very favorite flavors to date! Absolutely amazing!


After they were all filled and frosted, I added all of the chocolate toppers and stars to the cupcakes. 


All stacked up and ready to go! :) I also made a small cake to cut. It was a small 6 in cake with blue and green stripes. I used a lot of the stars and footballs to make a little starburst topper to add to the top of the cake as well.


Once I got there and I was able to put it all together I was so pleased with the final product. The football and star topper looked wonderful and festive for the big surprise birthday party!


We made a large display for cupcakes as well. 


Everything looked amazing when it was all set up. I am actually really happy/surprised that I was able to match the Seahawks colors so closely (Americolor, if you are in need). I had such a fun time working on this project!
Go Seahawks!!!


Rocking 40th Birthday Cake

Hello Everyone! 
Hope you're all ready for a fun, new twist on the "40th" birthday cake. No "Over the Hill" cakes here.....we celebrate the awesomeness that is 40! They wanted a German Chocolate Cake with a "Rocking 40" theme, with a lot of guitars. 
The biggest challenge I encountered with this cake project was the guitars. Molding them out of fondant was an option, but seemed rather tedious and time consuming. I found a really inexpensive chocolate mold on amazon that made that whole process a lot easier. I used different shades of blue candy melts in the chocolate mold and loved the results. I also used some Candy Melt Markers to draw on all the details. 
I also make some matching fondant stars in various sizes to help decorate the rest of the cake. 


I attached some of the star (and guitars) to floral wire so I could make a starburst topper for the little cake. 
***Sorry for the fuzz pic, I had shortening on the lens and didn't notice until after I delivered the cake. 


The German Chocolate cake came out wonderfully for the first attempt. I made two 8 inch cakes and let them cool while I worked on the frosting.


After the cakes cooled; I filled them with a caramel, coconut, pecan filling and stacked them. I covered it with a thin coat of chocolate buttercream. I was going to cover the cake in ganache so I did not want to make it too thick or overly sweet.


I mixed my ganache up (2:1 chocolate to cream), let it cool slightly because I still wanted to be able to pour it. And then started layering my ganache.

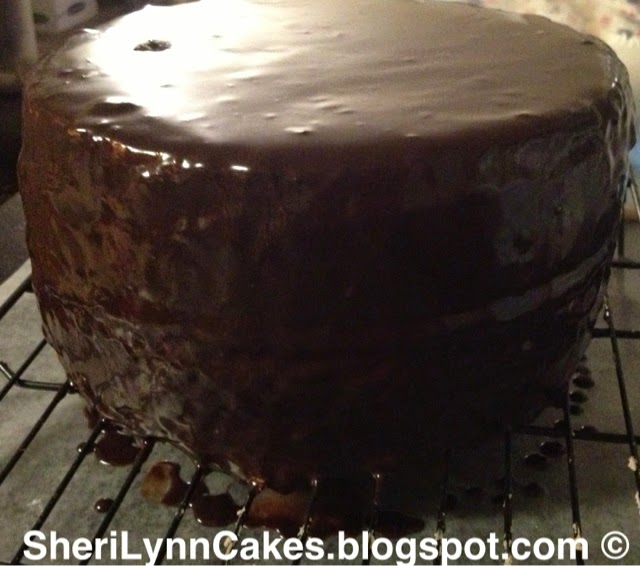
Layer One went on a little thinner than I expected but I wasn't too worried since I had more layers. This is the first time I had ever poured ganache over an entire cake, I normally just use it as a filling. I wish that I had taken the time on layer one to pop any bubbles and fix all the little imperfections that were starting to appear. Lesson learned I guess.


Layer Two of ganache went on a lot smoother and thicker. That little flaw on the top drove me crazy! That is why you should probably fix it on layer one. I tried to fix it at this point, because it became extremely obvious. But it didn't really make much of a difference.


Layer Three of ganache was wonderful and thick as well. I loved the look that ganache gives to the cake. I was very frustrated with that dang bubble on the top, but other than that the cake looked gorgeous. Haha! :)


After the ganache had set overnight I started to decorate the cake. The decorations were very easy to adhere to the ganache, which made decorating it a LOT easier than some other cakes I have done. But you can't pick anything back up, so make sure you have it where you want it. Haha!
Cannot express how much I loved this cake! The pictures really do not do it justice. The dark chocolate ganache color with the blues and silvers was absolutely amazing! I would love to use this color scheme again soon!


Here's the final product with the "40" topper :


As I said, the pictures do not do it justice. It is really gorgeous! And...isn't a "Rocking 40" cake so much more inspiring and fun than all of those gloomy and depressing "Over the Hill" cakes? :)

Thursday, April 10, 2014

Minecraft Creeper Cake w/Pig Cupcakes

My latest cake request came from my daughter's friend who is OBSESSED with Minecraft (who isn't? Lol!). She wanted a creeper cake with pink on it, so I decided to make some mini cupcakes with minecraft pigs on top. 
I had previously made a creeper cake (you can find a full tutorial here : http://sherilynncakes.blogspot.com/2013/10/minecraft-creeper-cake.html?m=1)

I made this cake in the same process that I had previously used, but I did add a pearl border to the top and bottom to jazz it up and make it look a little more feminine for her. 


I love it and think it turned out wonderfully. I enjoy doing cakes similar to those I have done before because it allows me to use the things I learned last time to make it better this time! :) 

Sunday, November 24, 2013

Pink Princess Cake with Shooting Stars

This weeks cake was inspired by one my friend had seen and described to me. 
It's a very glittery pink princess cake! Yay! :) 
I started by making all the fun little details that would make this cake special.
Using gum paste (with very little 'Deep Pink' coloring) I made numerous pink daisies. I let them dry in small plastic spoons to give them a nice curve in the middle, as well as a few petals moving different directions to give them.a more natural look.


When they were dry, I dusted them with pearl dust and added a small gumpaste flower center (which was also dusted with pearl dust) 


Using the same pink gum paste, I made a pink bow for the front of the cake. 
Placing rolled-up paper towels into the centers of the bow loops helps it stay in shape and not collapse on itself while it's drying. 
After it was dry, I dusted it with hot pink disco dust. Absolutely Fabulous! Haha! :)


Because this cake was a 2nd b-day cake, and would be eaten by many toddlers, I decided to use lollipop sticks instead of wire to hold up my stars. I used white gum paste and cut out stars, placed one on each side of the stick and 'glued' them together with water. Then once they dried I dusted them with white pearl dust to give them a nice shimmery star look. 
 

Besides the pearls, name banner and letters, I was ready for the cake assembling to start. 

I baked a vanilla bean cake with real Madagascar Vanilla Beans (yummmm!!!) 


Banana cream filling (with a pink frosting barrier)


After everything was stacked and frosted it was time to start putting everything together. 
I used fondant to make the banner, letters, and pearls (dusting them all with white pearl dust). I added pearls to the top, bottom, and the places where the piping touches in the middle. I stuck all the flowers down with a little extra buttercream, and dusted the whole cake with the disco dust so it shimmered. 
I also added a silver and pink tiara, as well as a little wand on the front next to the bow. 


And to finish it off....the stars!!! I added 5 stars, all a little off center from each other.


I absolutely love how this cake came out!!! Super cute and girly! <3 always thankful for all these different, fun cake projects!

Sunday, October 6, 2013

Minecraft Creeper Cake

It has been so insanely busy with everything this summer that I have not had any time to blog. 
I hope you all had a wonderful summer! Hope you were able to get outside in the wonderful sunshine, try something new, and make lifelong memories! We made quite a few - like visiting Crater Lake, camping at the beach for the 4th, and many hot days grabbing ice cream. It was wonderfully perfect but BUSY! 
It's kind of nice to get back to a regular schedule but I do miss them while they're gone.

But anyway...back to the fun cake stuff :) 

I don't normally bake very much during the summer but because it was my son's birthday I told him I'd make him whatever cake he would like. It kind of became a challenge to see how creative he could get. Hahaha! It was fun though. 
He ended up settling on a MineCraft Creeper. Now, having never seen the game before (we bought it for him for his birthday, so I know what it is now but didn't then) I took this as a great chance for my son to be more hands on as well. He showed me a few pictures (for those of you that don't know, a 'Creeper' is one of the bad guys on the MineCraft game. This game is a Pixalized world where you can dig, build, and create whatever you'd like. My kids love it. It's creative and relatively non violent). 
We decided to make it look Pixalized by using many green squares put together to create his face. 
We started out with marshmallow fondant (melted marshmallows, water, and powdered sugar) 


and slowly started adding green to it...


... until we had MANY shades of green to work with.


I rolled it out thinly and had my son help me cut squares. This is the part where the dreaded MATH comes in. My cake was a 6in square. I made my fondant squares 1/2in each, requiring me to make 12x12=144 little squares to cover the top. I ended up making 200 because some break, or don't quite fit perfectly, or was the wrong color. It gave me some more flexibility when making it...it did require a bit more time though. 


I had to layer them to get them all on 2 plates but I got them on there. I made sure they could dry out a little more, which helped when constructing the cake. 


He also wanted a few TNT bricks to go around the base of the cake. I made some of the marshmallow fondant red, formed little squares, wrapped them with white fondant, made a little 'banana peel' topper and then wrote TNT on the front with some red food coloring. 


We frosted the cake with some simple green buttercream frosting and started placing on our squares. They weren't quite perfect but they did the trick, and honestly ended up looking a heck of a lot like the real Creeper. 
I used some black piping gel to paint the face on, and the '11' on the front. I also used a grass tip to make a pretty little border around the bottom. After placing the TNT bricks around the base, it's finished! :) yay! 


AND not only did it look great but it was absolutely delicious!!!! We had to make the cake green too! Couldn't resist. It was such a big hit! 


Can't wait to see what kind of creative cake theme he comes up with next year!!! :)

Saturday, July 6, 2013

Drop Flower Chocolate Cake

My mother in laws birthday was yesterday, so I decided to whip her up a quick cake. She is on a gluten-free diet and (thanks to Betty Crocker) I was able to make her one!
I know she loves chocolate, so I made a devils food cake, with PB/chocolate filling and chocolate frosting. I used a 6in pan, and did three layers to achieve the height that I wanted. 


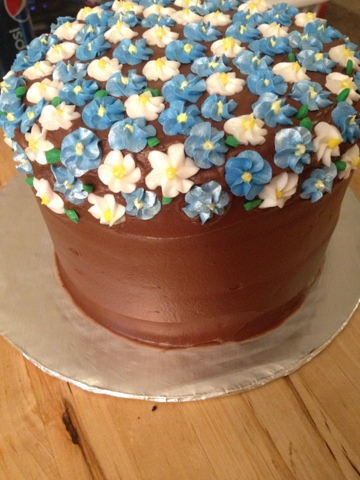
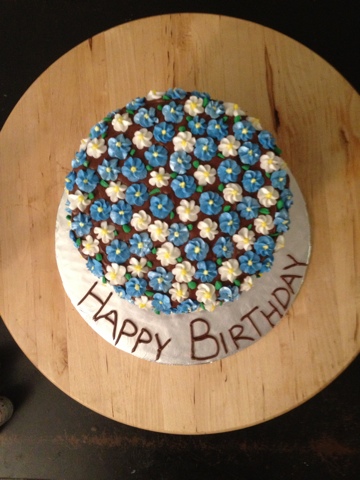
Those kind of cakes, though absolutely delicious, are not always the prettiest. So, to make it a little more special I started to added some royal icing drop flowers (that had been sprayed with a pearl glitter spray)....


...lots of them! Allowing them to cascade over the sides.

 I also added some green leaves...


....a chocolate pearl border...


...and a happy birthday message on the cardboard.


It was absolutely delicious! I was super impressed with the Betty Crocker gluten-free cake mix! It's awesome! Yay for finally allowing many people to make yummy cakes at home again! Love them for that!!! 

I was really happy with the end result (and so was my MIL)! It looked gorgeous and tasted even better. And didn't take me any time at all! Gotta love the easy, show stopping cakes! :) 


Thursday, May 9, 2013

Lace Airbrushed Cake

I apologize for my lack of pictures this week. I try so hard to grab as many pictures as I can but this week I had some dental work done and was just not really motivated (or 'alert' enough to remember) to take pictures before I was finished. I am sorry for that! 
However we did learn how to work with the airbrush this week in class. It was very interesting! I am not an artist, so I was using it more as a tool for laying a base/accent color down on my cake. Not necessarily to 'paint' an image on the cake. I am not that talented sadly. 

But I did lay some lace over my simple 9x13 frosted with white buttercream. I decided to try to make a teal colored cake this week. So I mixed blue, white, and a little bit of green, to give me that nice bright teal color. I sprayed all over the cake before removing the lace, giving a more continuous look to the pattern. 

Then I placed a 'Happy Birthday' stencil over the top of the cake and sprayed black over it. It worked out pretty well! Way better (and FASTER!) than using icing for sure!

We also worked on making gum paste flowers today. They didn't have enough time to dry completely. However they were dry enough to place on the cake, just not dry enough to cover with petal or luster dust. So they stayed white. But that's fine. It looks great with this cake. The color is so bright that the simpler flowers are needed. 
I did make a few small leaves covered with petal dust (as you can see it didn't cover completely) to help complete my flower arrangement. 

The finishing touch was the simple pearl/circle border around the bottom to cover up any mistakes. 

It's definitely not perfect but I am pretty happy with it. I am giving it to my friend this week. It's not her birthday exactly...but soon. So why not celebrate early! :) 


Monday, April 29, 2013

Sunflower Fondant Cake

My class this week focused on fondant. I had worked with fondant before but I had never covered a whole cake with it. Only to make small things (like cupcake toppers). However it turned out well. I was just playing around. There is no real occasion for this cake, but my friends are going to enjoy it. :)


I started out with two 8in (vanilla) round cakes, cut to be even on top, and then cooled.


I then used a simple ziplock bag (this was such a small area I didn't feel the need to dirty a pastry bag) to pipe a little barrier to help hold in my ganache/buttercream mixture.


Then filled it with a yummy combination of buttercream frosting and a ganache that I just couldn't get to set up (and I didn't have time to melt more chocolate into it either). But it tasted really yummy and it spread onto the cake very well.


After stacking the two cakes, I used a thinned down buttercream frosting to crumb coat the cake. Because we were adding fondant to this cake I did add a little more buttercream than I normally would to help it taste better for those that hate (and pick off the) fondant.


I was going to make my fondant but due to a crazy schedule this week, I just bought a tub of it. Much easier. A little more expensive. But for my schedule this worked best.

Once I got to class, I kneaded my fondant (using a little shortening to help keep the fondant from sticking) until it was nice and pliable. I used this time to add a little cheesecake flavoring, the oil based flavors used for candy making. Awesome! Now I have a yummy flavored Cheesecake Fondant! :) Then I rolled it out large enough to make sure the top (8in) and both sides (3-4in each) of my cake were properly covered. And flipped it on top of my cake.


Slowly, working from the top to the bottom, I rubbed the cake and helped it stick and smooth onto the buttercream below. Once I reached the bottom I used a pizza cutter to remove any excess fondant that remained around the bottom of my cake and smoothed it down.


After coloring my fondant blue, yellow, and orange, I started decorating.

I used some molds (pearl border and swags) to help make decorations for the cake. Using a lot of corn starch on the fondant and dusted on the mold. I had a few places where the swags stretched and ripped a little but they turned out alright as long as you don't look for a long time.

And the yellow pearl border across the bottom of the cake was simple, easy to add more or to fix if I messed it up, and stunning!


I made fondant flowers by using a silicone mold and two different colored fondants. The center of the flower was a cute little button.
I also dusted the swags with a white pearl luster dust. And I dusted the flowers with a gold luster dust all over to give them a warm feeling.


I made a sunflower cake topper to help make the cake look a little more finished. And added two simple leaves. All made using a plastic mold, cornstarch, and fondant.
To help complete the look I also dusted the sunflower with luster dust. I used Gold on the yellow, a cantaloupe colored luster dust on the orange, and a pretty green shimmer on the leaves.

And it's finished and ready to eat! :)