Showing posts with label how to. Show all posts

Saturday, June 14, 2014

Edible Cameo Brooches

Hello Everyone! <3 I am really excited to bring you this tutorial today. I looked everywhere online for a tutorial for chocolate cameos when I was making these and couldn't find anything. I hope this tutorial helps you, or inspires some new ideas for you, while working on your projects :) 
I found this wonderfully beautiful cameo brooch chocolate mold at my local decorating store. I am sure you can find them online as well if you do not have a cake/candy supply store near you. 
I melted some white chocolate and, using a small paint brush, applied it to the "face" of the cameo brooch. I let that set up in the freezer for a minute or two before I added the colored portion to the back. 


For this project I used pink candy melts and white chocolate to make a very soft pink color for the background of the cameos. 
I filled them up with a small amount of the
Pink chocolate mixture, tapped it down to help fill in all the gaps, bring all the bubbles to the surface, and smooth out the top. 


After returning them to the freezer for another minute or two so they could set up, I simply tapped the mold on the table and they popped out. IF you're having problems getting the chocolates out of the mold, pop it back in the freezer for a while longer...it might now be solidified enough to come out nicely. Chocolate that has been tempered properly will also have a nice shine when it comes out of the mold as well. 


Since the brooches were missing something, I decided to paint the rope border gold. I used a little shimmer dust and vodka to make a paint and simply brushed it on. I did have to do two layers to make sure it would stick. Next time, however, I am going to paint the rope border on with a corresponding chocolate color so I don't have to spend so much time painting the gold on. 


BUT with all that being said...THESE ARE MY FAVORITE TOPPERS EVER!!! Oh my! I am in love with these and want to make some in every color now! Obsessed doesn't even begin to describe how I feel about these. Lol! I know, I know...I am gushing! But like I said, with no tutorial I was really crossing my fingers and hoping they would turn out okay. And obviously I am beyond pleased with how they turned out!


Gorgeous! Gorgeous! Gorgeous! And yummy! Can't beat it!


And since these were going to a vintage tea party themed bridal shower, I wanted to make these blend in with the other fondant decorations so I added purple flowers to help frame the bottoms.

ADORABLE!!! Haha! I know I keep saying that but these are my new favorite thing! 

 
Just so pretty :) 

And these are all the other fondant details that will be on the cupcake toppers : 


Perfect for a summer vintage tea party bridal shower <3 <3 <3 

Sunday, October 6, 2013

Minecraft Creeper Cake

It has been so insanely busy with everything this summer that I have not had any time to blog. 
I hope you all had a wonderful summer! Hope you were able to get outside in the wonderful sunshine, try something new, and make lifelong memories! We made quite a few - like visiting Crater Lake, camping at the beach for the 4th, and many hot days grabbing ice cream. It was wonderfully perfect but BUSY! 
It's kind of nice to get back to a regular schedule but I do miss them while they're gone.

But anyway...back to the fun cake stuff :) 

I don't normally bake very much during the summer but because it was my son's birthday I told him I'd make him whatever cake he would like. It kind of became a challenge to see how creative he could get. Hahaha! It was fun though. 
He ended up settling on a MineCraft Creeper. Now, having never seen the game before (we bought it for him for his birthday, so I know what it is now but didn't then) I took this as a great chance for my son to be more hands on as well. He showed me a few pictures (for those of you that don't know, a 'Creeper' is one of the bad guys on the MineCraft game. This game is a Pixalized world where you can dig, build, and create whatever you'd like. My kids love it. It's creative and relatively non violent). 
We decided to make it look Pixalized by using many green squares put together to create his face. 
We started out with marshmallow fondant (melted marshmallows, water, and powdered sugar) 


and slowly started adding green to it...


... until we had MANY shades of green to work with.


I rolled it out thinly and had my son help me cut squares. This is the part where the dreaded MATH comes in. My cake was a 6in square. I made my fondant squares 1/2in each, requiring me to make 12x12=144 little squares to cover the top. I ended up making 200 because some break, or don't quite fit perfectly, or was the wrong color. It gave me some more flexibility when making it...it did require a bit more time though. 


I had to layer them to get them all on 2 plates but I got them on there. I made sure they could dry out a little more, which helped when constructing the cake. 


He also wanted a few TNT bricks to go around the base of the cake. I made some of the marshmallow fondant red, formed little squares, wrapped them with white fondant, made a little 'banana peel' topper and then wrote TNT on the front with some red food coloring. 


We frosted the cake with some simple green buttercream frosting and started placing on our squares. They weren't quite perfect but they did the trick, and honestly ended up looking a heck of a lot like the real Creeper. 
I used some black piping gel to paint the face on, and the '11' on the front. I also used a grass tip to make a pretty little border around the bottom. After placing the TNT bricks around the base, it's finished! :) yay! 


AND not only did it look great but it was absolutely delicious!!!! We had to make the cake green too! Couldn't resist. It was such a big hit! 


Can't wait to see what kind of creative cake theme he comes up with next year!!! :)

Saturday, July 6, 2013

Drop Flower Chocolate Cake

My mother in laws birthday was yesterday, so I decided to whip her up a quick cake. She is on a gluten-free diet and (thanks to Betty Crocker) I was able to make her one!
I know she loves chocolate, so I made a devils food cake, with PB/chocolate filling and chocolate frosting. I used a 6in pan, and did three layers to achieve the height that I wanted. 


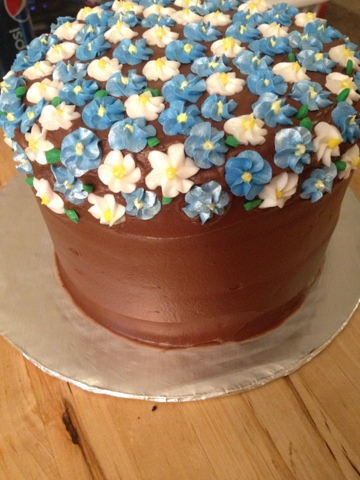
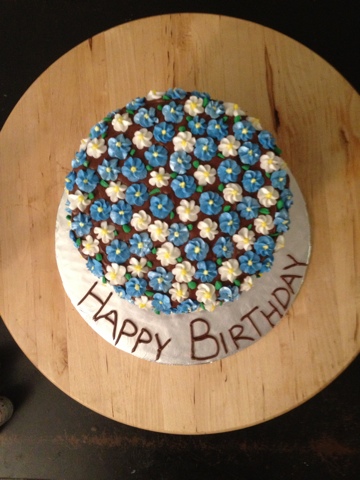
Those kind of cakes, though absolutely delicious, are not always the prettiest. So, to make it a little more special I started to added some royal icing drop flowers (that had been sprayed with a pearl glitter spray)....


...lots of them! Allowing them to cascade over the sides.

 I also added some green leaves...


....a chocolate pearl border...


...and a happy birthday message on the cardboard.


It was absolutely delicious! I was super impressed with the Betty Crocker gluten-free cake mix! It's awesome! Yay for finally allowing many people to make yummy cakes at home again! Love them for that!!! 

I was really happy with the end result (and so was my MIL)! It looked gorgeous and tasted even better. And didn't take me any time at all! Gotta love the easy, show stopping cakes! :) 


Friday, June 21, 2013

Shamrock Mini-Cupcakes

This week I had the wonderful opportunity to make a huge batch of mini cupcakes for a fantastic charity, the St. Baldrick's Foundation (which raises money to fund research for childhood cancer. Look them up and donate! It's an amazing cause!). They were having a head shaving party/ spaghetti feed and wanted a fun dessert. 
The charity is Irish/St.Pattys day themed, so we wanted to make some fun/glittery little toppers. 
Using pre-colored fondant I rolled it out about 1/8in thick and using a small primrose cutter, I punched out a pretty green primrose. To turn it into a shamrock I took a very sharp knife and simply cut one of the petals into a rectangle for the stem. It actually worked A LOT better than I expected. 


Then I started making TONS of them...


Until I reached 450 (400 for orders, 50 just incase)...


I let them sit for a day or two to help them dry out (much easier to pick up and place on the cupcake that way). When they were ready, I mixed HOT water and corn syrup in a spray bottle and lightly misted the shamrocks with this mixture until they were slightly tacky, but not too wet. Then I used a dry paint brush, dipped in emerald green disco dust, and sprinkled it over the top - making sure to cover each one really well.


I let that dry and went over it one more time (using even less water/corn syrup this time), to ensure that each one was well covered


Then onto the next project - the cupcakes :) 
Yummy buttery vanilla mini cupcakes!!! I always add an extra tsp. or two of a Butter/Vanilla extract because I like my cucpcakes to be a little richer. 
And using a scoop is THE BEST advice I could give you! Get one for your large cupcake and minis. It will absolutely change your (baking) life!!! Haha! :) I know that sounds silly but I used to loathe cupcakes until I got my little scoops. No more batter on my hands, no more mess, or unevenly baked cupcakes! Seriously the best! 


See, it makes them all so even and nice! 


And it helps me finish in 1/2 the time! 


I baked those off (always at 325deg. no matter what the recipe says, to help them raise more evenly), and placed them on cooling racks until they just cooled down.


And then I baked 412 of them :) 


Placed them in boxes (with double strength cardboard on the bottom) and wrapped them with Saran Wrap so they didn't dry out overnight. 


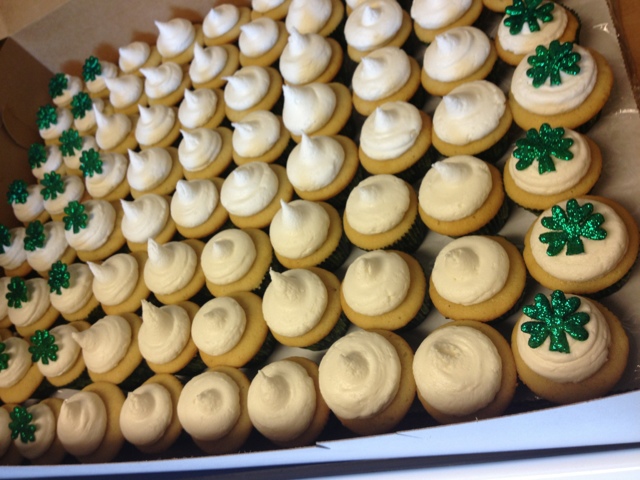
The next morning I made up a fresh batch of fluffy white buttercream and used a (very) large round tip to frost them. 


And then placed the glittery shamrock toppers on top of the cupcakes before the buttercream crusted. 


They looked wonderful when they all got done!


And 5 boxes, 400 cupcakes, and they are done! :) Yay! 


Getting ready to drop them off at the event and I couldn't help but grab a little photo op with Abe Lincoln (all dressed up for the fundraiser). He approves of the cupcakes :) lol! 


And all set up! 6 tiers and even had to cover some of the table. 
They looked really spectacular on the table! The whole thing was as tall as I was and a big hit!!! :) I am so in love with this cupcake tower! The visual impact was wonderful! Better than I ever expected!!!


Thursday, April 18, 2013

Royal Icing Flowers

Class this week was centered around different royal icing flowers and leaves.


The first flower we worked on was a violet. 2 small petals on the bottom, 3 on the top with two little dots in the middle to finish it off. Very cute!


Then I put them in the flower formers to help them get a more natural look.


The next flower we made were pansies, Purple and yellow this time, though they can come in a variety of colors.
You make them by making 2 (yellow) petals on the bottom, followed by another two smaller petals on top of those two. And adding 3 petals to the top, however with these petals I did not make them individually, I just continued piping until all three petals were made.


I placed them in flower formers to dry, and added a tiny little yellow circle to the middle of each flower. This connects the two colors a little better and makes it look a little more life-like.


Another way to make them a little more realistic is using a very tiny paint brush or toothpick and painting little 'faces' on them with violet color gel. It really helps make them look better.


The next flower we worked on was ridiculously simple! A very tiny Forget-Me-Not. Beautiful and simple. I LOVED them!!! Using a tip#101s I made a simple 5-petal flower, which came out extra tiny but adorable.


Next we learned how to make a few flowers in a lily nail. We covered the nails in foil covered with a TINY bit of shortening, to make it easier to remove the flowers later.

The fist flower was a purple petunia.


For the stamens I used some lily stamens first.


And then fancy pearl stamens, giving each of them a slightly different look.


Switching to white royal icing and a leaf tip (354 I think...) to make the Easter Lilies.
I loved them! I made all the petals and then went back and place the lily stamens in the middle, adding extra royal icing so they didn't fall down.


I was lazy when making the next flower and I didn't color the frosting. So I ended up with white poinsettias but still beautiful. Honestly one of my favorite flowers I have made so far. It would be fun to cover them in red and gold luster/disco dust! :)


And after making all those flowers, some greenery is needed! :) so of course we worked on some simple leaves with the #102 tip. They are nice and will work with many different types of flowers.


And some beautiful holy leaves for Christmas time :)


And an adorable Christmas tree, or bush, or whatever else I would like to make this into. It's pretty easy. Using a leaf tip (like I did), or a star tip, I worked from the bottom to make the tree. As you can see I need to work on the top of it, but you get the idea. Haha :)