Thursday, May 29, 2014

15th Anniversary Cake

This was a simple cake that I put together quickly for a 15th anniversary. I used cream cheese frosting as a base and added fondant details to the top of that. I used simple stripes and pearls, but added a '15' to the top. 


It turned out well for a last minute cake :) simple but elegant

Silver 25th Anniversary Cake

A dear friend of mine is throwing her 25th wedding anniversary and asked me to make her a small cake with a cupcake tower. Her theme was the roaring 20s, flappers, feathers and jewels. And everything needed to be colored in silver, black, or white. 
I designed a small cake that would be silver with white flowers and white pearls frappe over every part of the cake. 
Once I knew what my cake would look like it was onto cupcake toppers. I found this really great chocolate mold that has '25' written in the middle of a circular medallion. I gathered up all my supplies a and started working. 


I made 200 little white chocolate discs


I used the Wilton Color Mist in Silver to spray the chocolate toppers and make them appear totally silver


The next step was to make the '25' stand out. I used the black Pearl Dust mixed with a little vodka to create a 'paint' which filled in the little number indents very well.
Though it was EXTREMELY time consuming!!! 
(14hrs total for these toppers start to finish!!!) 


ALMOST DONE!!! Lol! 
The next and last step is the bling :) we have to make these look ornate and like a brooch, so I need to use silver dragees. I added a little edible adhesive glue to the center of each little flower (around the edge) and added a small silver dragee. And as you can see the impact is worth the little extra time. 

 
And here is a close up of the finished product


I am completely in love with these! They're super cute and will even taste yummy! 

Now that those are done its time for me to start working on all the bits and pieces that I will need for my cake. 

The first thing to make are the gum paste flowers. I am only using white since she will be having a silver cake. I made a few roses and some small filler flowers for the topper

 
I also made up some gum paste numbers. '25' for this cake and '15' for a cake I was making the same day. The '15' was done in white gumpaste but later painted with the same black pearl dust as the inside of the '25' on the chocolate toppers, and the '25' was finished with some silver disco dust for a huge impact! 


I made a small little 6in round cake. Frosted it with cream cheese frosting, and piped Corneille lace all over. I then sprayed it with Wilton's Food Spray in Silver. It gave it a wonderful antiqued look. Then I placed the gum paste flowers and the feather topper on top. They looked amazing!!! I also draped some fondant pearls around the top to enhance the "roaring 20s" theme. 


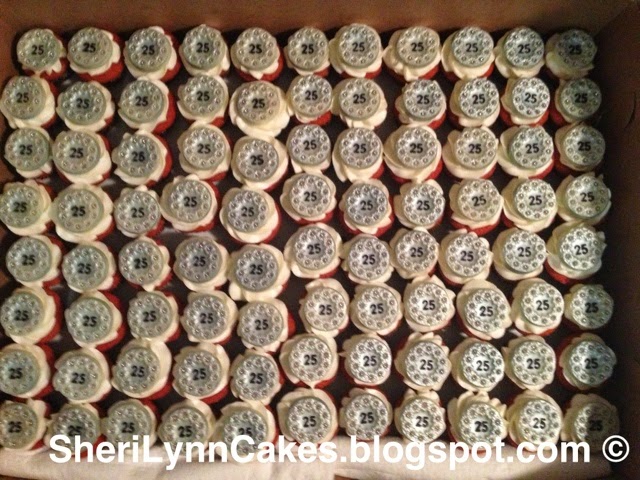
I also frosted and topped all of my cupcakes.


They looked wonderful. I love the little toppers! And they're edible...even better! :) 


Once I arrived at the venue I was able to add the glittery '25' topper...and it looked FABULOUS!!!! Absolutely amazing and perfect for the party! 


And once it was stacked on the top of the cupcake stand it looked even better. I added some feather boas to the edges of the cupcake stand to make it look fancier and to help "carry" the feathers down the stand. 


It looked truly wonderful when finished! One of my favorite projects to date <3 <3 <3 


Tuesday, May 6, 2014

High Heel Mini-Cupcakes

I am sure you have seen pictures of this new 'trend' for cupcakes online, they are high heel cupcakes! Yay! What does a girl love more than cupcakes? Shoes!!! 
I was so excited when I had a friend ask for some I could barely contain myself. Oh the possibilities!!! Haha! I was given a color scheme of White, Silver, and Turquoise to work with. Adorable! I couldn't wait to get started! 
I began by looking at pictures online to get inspiration for decoration (none of the tutorials were extremely helpful with construction ideas however, since I am using mini cupcakes and will have to use different materials to make my cupcake heel). I decided that a combination of bows, flowers, and swirls would be best to decorate the cupcakes. 
The swirls would be piped on with buttercream, so no prep needed there. But the other decorations would need to be made out of fondant beforehand. 
I made my own fondant with some mini-marshmallows, water, and powdered sugar. If you've never made your own marshmallow fondant before - simply microwave around a cup marshmallows with a little over a tsp or so of water. When the marshmallows start to swell, remove them from the microwave and add powdered sugar until it forms a dough. Continue to kneed it together until it forms a fondant texture. Use shortening and powdered sugar to help get the correct consistency. 
I made up my white toppers, then covered them with some white pearl dust. I also made up some extra toppers with white fondant that were then sprayed with silver Wilton Food Color Spray. I then made up some turquoise fondant to make bows and flowers.
I added some edible adhesive to the centers of each flower and added white sprinkles or silver dragees to the adhesive. I was really excited with the end result! They look adorable! I cannot wait to put them on the cupcakes! 


Since the colors are white, silver, and turquoise, and they wanted red velvet flavor for the cupcakes I just made them turquoise velvet cupcakes instead. 


With white and blue cream cheese frosting


While I was waiting for my blue velvet cupcakes to cool, I made a test high heel :) I used a oblong butter cracker for the soul of the shoe, added a small amount of frosting to the back and attached a pretzel heel. It worked pretty well for regular chocolate frosting.


After I was sure about the best way to put them together, I started piping blue and white frosting onto each one and then added on the cooridinating toppers. They looked ADORABLE!!!!!! I had to put them in a box to transport them but it worked pretty well (this is box one of two).


When I finally got there only a few of them had broken heals, which were easily repaired. 
I set them up on my cupcake stand and they looked amazing!!! 


They were definitely a fun (but time consuming) project! So happy I got to do them though because they were worth every bit of it!!! :)